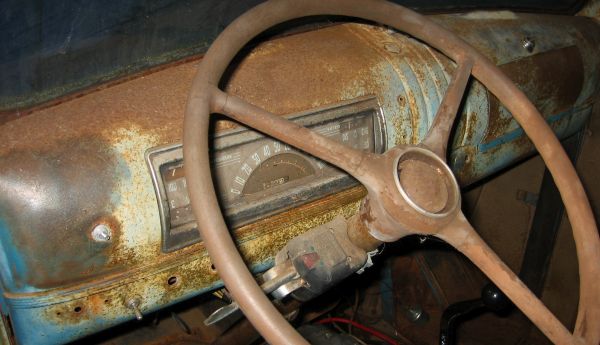
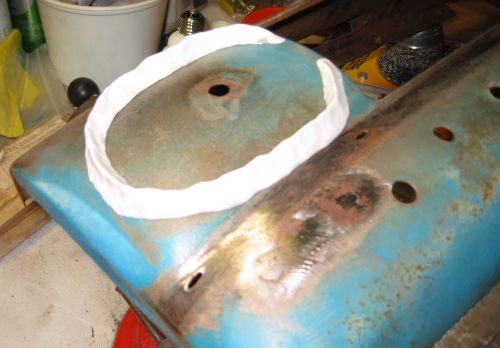
The truck did not have a heater in it when I got it. You could see where something had been previously installed on the firewall, but apparently not factory. I think heaters were actually optional equipment back then. I plan to install a universal heater/AC unit at some point, but right now I am working on the dashboard, so my immediate concern is with dashboard vents.
There is a fair bit of room on each end of the dashboard to add air vents. No room in the center unfortunately, that is where the stereo will go. In these old trucks, the dashboard is all steel, and can be removed from the vehicle as a single piece, making modifications fairly straight forward (but not what I would call easy).
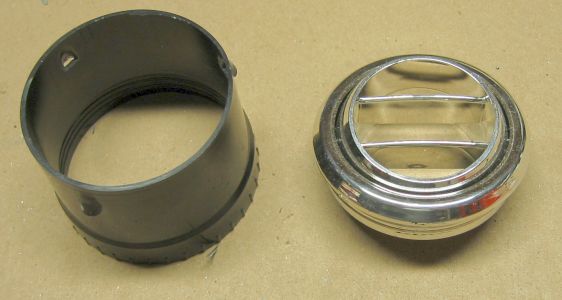
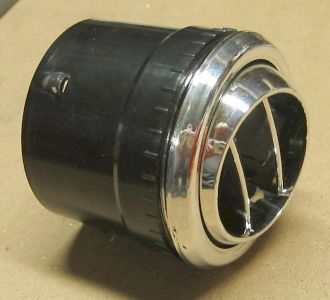
Vintage Air makes some nice (and affordable) universal vents. These mount in a 2.5 inch hole, so all you really need to do is cut the hole, and mount the vent. The two pieces shown are threaded, and just screw together. Easy.
The problem is that the dashboard is curved, and to look right, the vent needs to sit on a flat surface. There are easier ways to solve this, but you probably know by now, I cant do anything the easy way. I need to make a flat spot.
My first thought is to use a hammer and dolly to flatten out the metal around the vent area. There are a couple of problems with this approach. One is that you run the risk of distorting the entire dashboard to where it wont fit back into the truck right. Another is that you really need to be pretty good with a hammer and dolly to get a decent smooth finish. And still another is actually getting it flat. Doing it is harder than saying it.
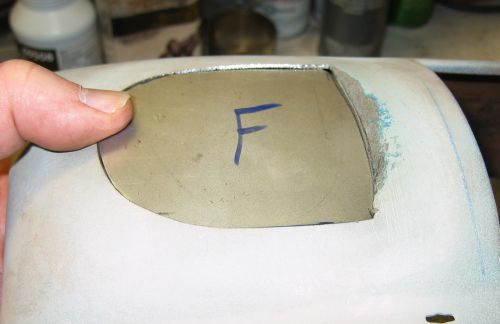
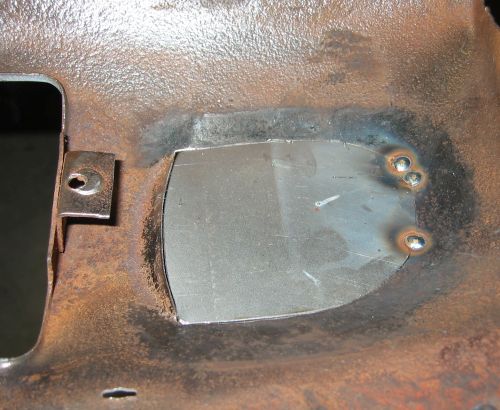
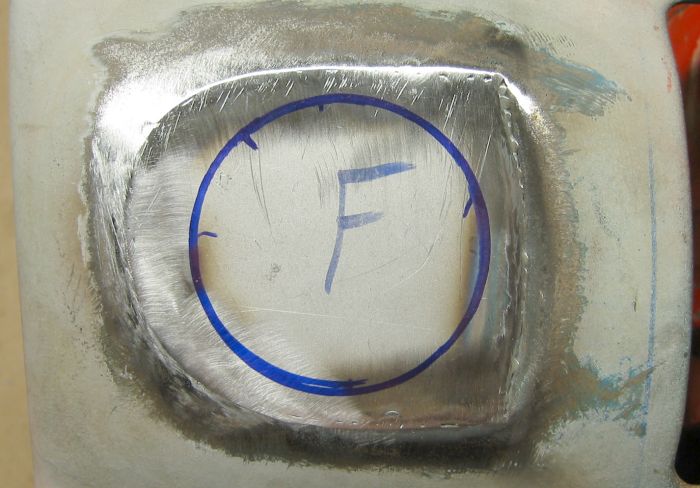
So I went with a safer approach: cut out the curved metal and weld in a flat piece. The plan is to cut along the contour, so that the surface of my cut will be flat, then I just lay a new piece of metal in the hole and weld it in. So how do you know where to cut?
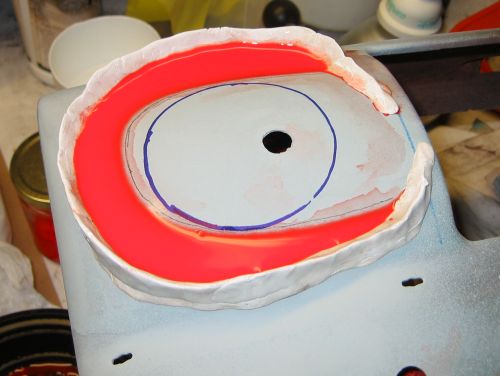
This is how I did it. First I marked about where the hole need to go (well, maybe it wasn't the first thing I did, but it should have been), then I used some modeling clay to build a dam around the whole area. Then fill it with a water soluble paint (so that you can clean it off and do it over again when it comes out wrong). The trick it to get the dashboard leveled just right so that the paint flows around the hole and shows you where the contour line is.

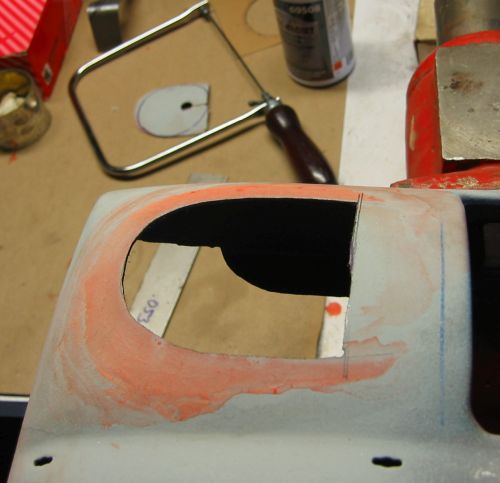
It didnt work as well as I had planned. The paint did not leave as distinct a line as I had hoped. So I wound up drawing a line around the edge of the paint puddle, with a pencil. I use a coping saw to cut out the shape. This is a fairly slow process, but more accurate than any other method I know. The final edge, where there is no paint, I cut straight and parallel with the instrument cluster opening. This edge still curves up and away from my "flat" surface. I will hammer this edge down to meet the new metal.
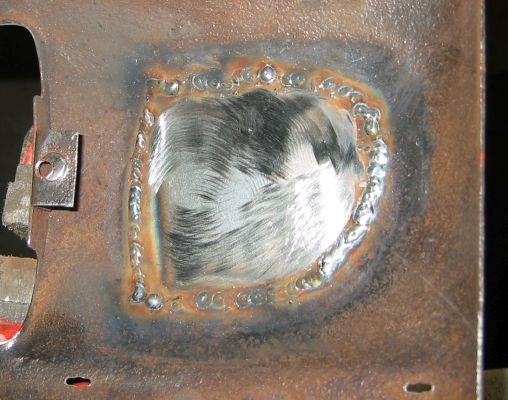
I take quite a bit of time to fit the new metal to the opening. I want a nice tight fit. Gaps will fill in with the welder, but there is a bigger risk of blowing holes when filling a gap. The job always comes out nicer and cleans up better when you start with a good fit. It does not show up well in these photos, but the "straight" edge has already been bent down with hammer and dolly to meet the new piece.
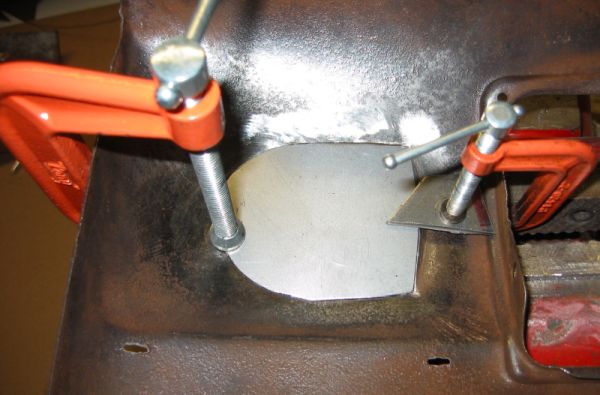
Clamping this for welding was a bit of a challenge. This is one of those spots where no kind of clamp seems to work very well. Magnets might actually be a good solution here. I need to get some good strong ones and try this out.
I did all the welding from the back side, this reduces the cleanup work that will be needed later. Looking at the back side is a reminder that this is 75 year old metal, which has NEVER seen paint. I ground the rust off around the weld area, on both sides of the steel, before starting to weld.
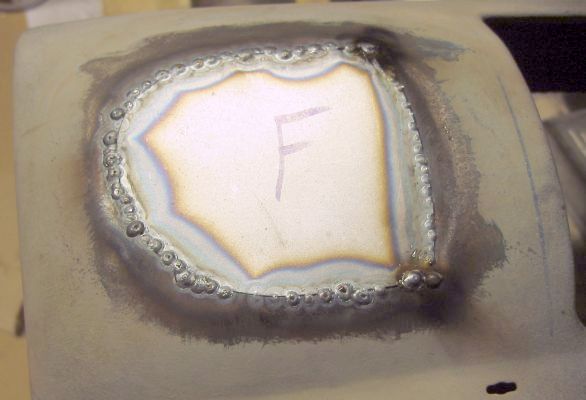

The welds mostly melt clear through to the front side, so it takes some time to file and grind it down smooth. A better welder could probably do cleaner job, but this pretty good for me (no big melted holes).
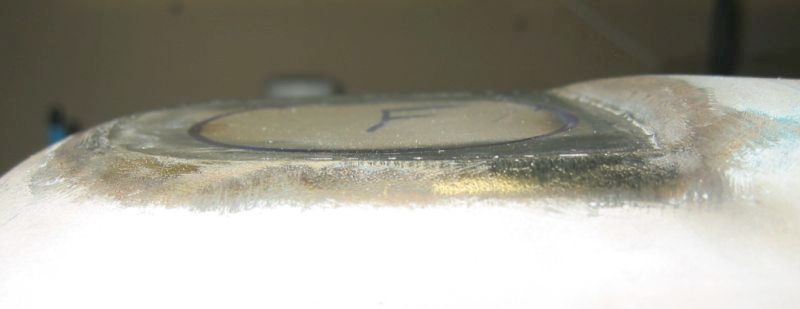
Here is an edge-on view that really lets you see the profile. The vent now has a fairly flat surface to mount on, and hopefully has an almost factory original look to it.
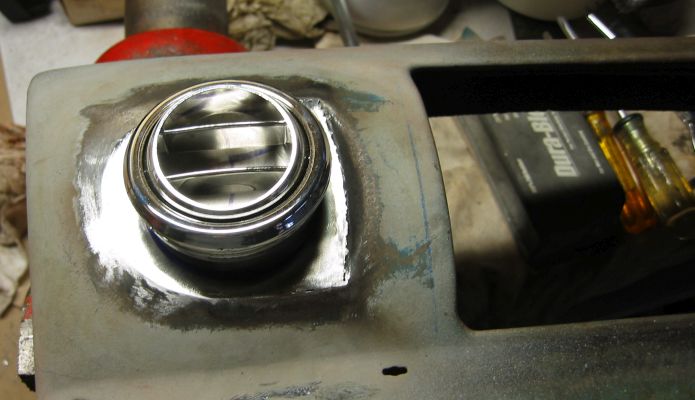
I still need to cut the 2.5 inch hole for the vent. I left this for last for a reason. I want to give the flat steel as much rigidity as possible during the fitting and welding process. Cutting the hole earlier would significantly weaken the metal and reduce our chances of ending up with a good flat surface.
| << Previous | Back to Menu | Next >> |