Floor Repair
There was a fair bit of rust damage in the front corners of the
floor board area. This seems to be a spot where water accumulates due
to the cup shaped design of the support structure under the floor.
There are five different pieces of metal in and around this corner that
are rotted out, and
I will be attempting to repair.
We are looking at the floor area just at the front edge of the
door. The floor pan is sitting up at an odd angle because the new 5
speed transmission doesn't fit underneath (the floor pan will be
rebuilt for a custom fit, but we are getting off subject).
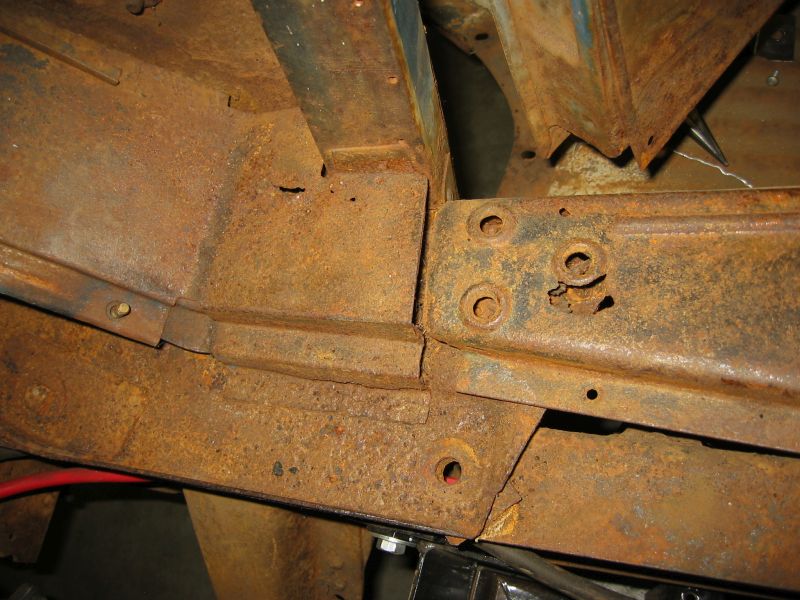
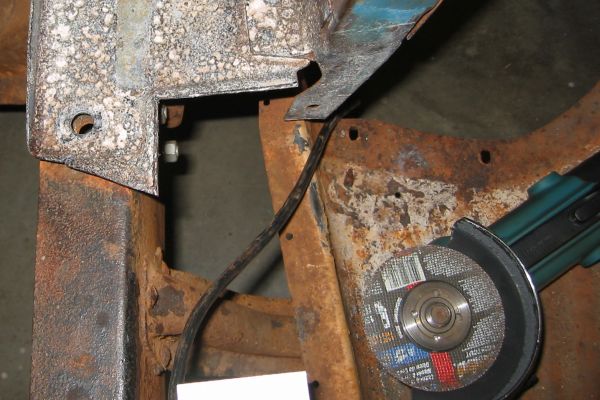
This is the same area from a different angle, and with the
floor pan removed. There are several rust holes visible here, the
largest of which is just below one of the three bolt holes
near the center of the image. Some of these holes actually had bolts in
them when I first got the truck. When I tried to turn them, the bolt
heads easily broke off, as the bolts themselves were rusted completely
in half. It turns out that this cab was originally mounted on
four wooden blocks. One of them was directly beneath this rotted metal,
with these three bolts going through it. It seems that the wood gets
wet when it rains, absorbs the water, and then holds the moisture
against the metal all winter.
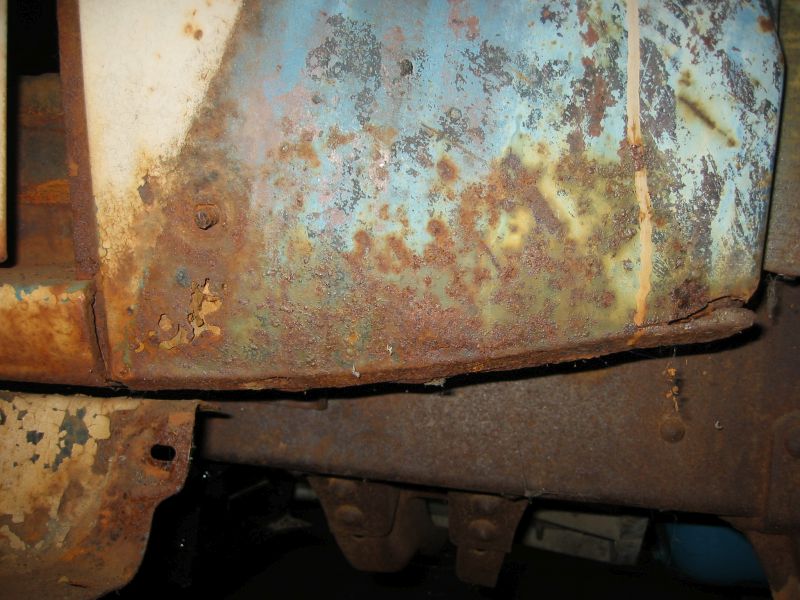
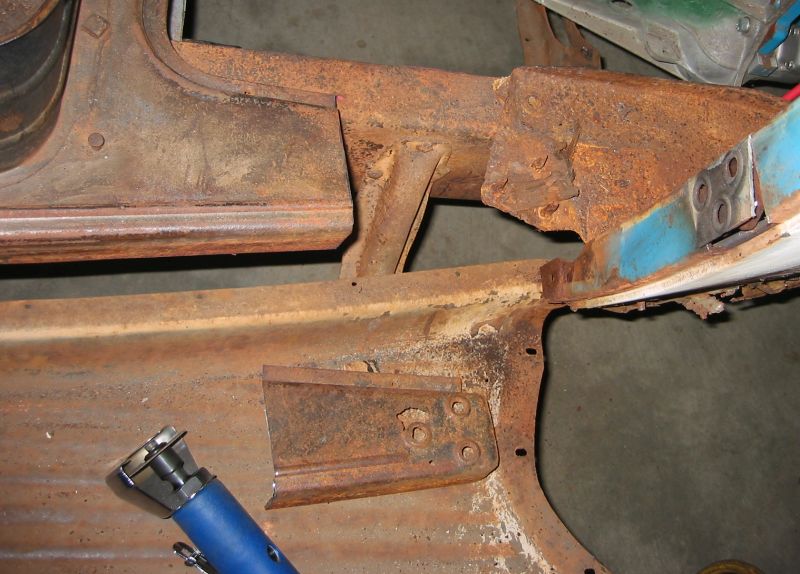
This is the same general area just in front of the door,
viewed from outside the truck. You can see spots where the metal is
rotted clear thru, and much of this metal is so bad you could poke you
finger through it. There are actually two pieces of metal here, an
inner (which you cant see) and an outer. The two form a pocket for dirt
and debris to fall into, which again, gets wet and holds the moisture
against the steel. We wont be attacking this piece today, but we will
get back to it eventually.
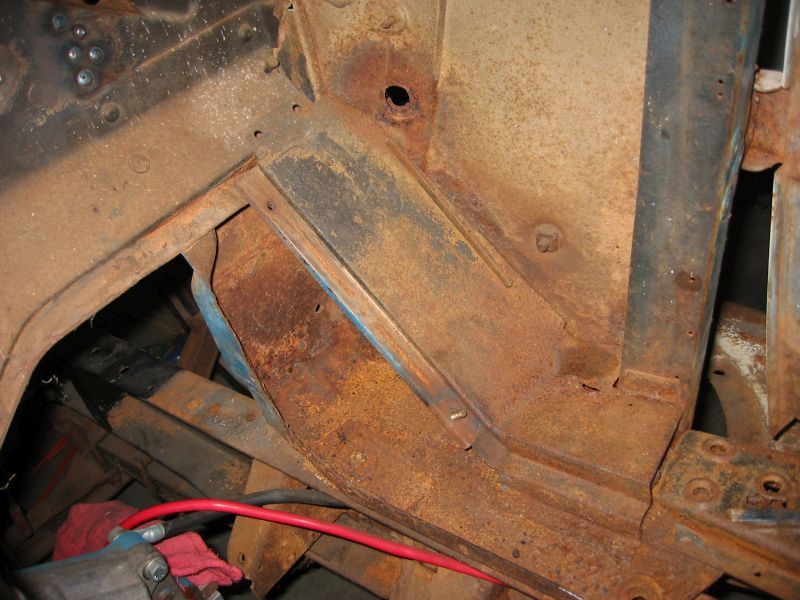
Back inside the cab, the next rotted metal is this floor
piece, from the edge of the door on the right, to the firewall on the
left. This part is spot welded in place, and forms the mounting flanges
for the floor pan. The top half of this piece is in good shape, but the
lower half looks like it has been sitting in a puddle for decades. This
is a fairly complex piece and it will be difficult to reproduce. But
for right now, I just need to get it out of the way.
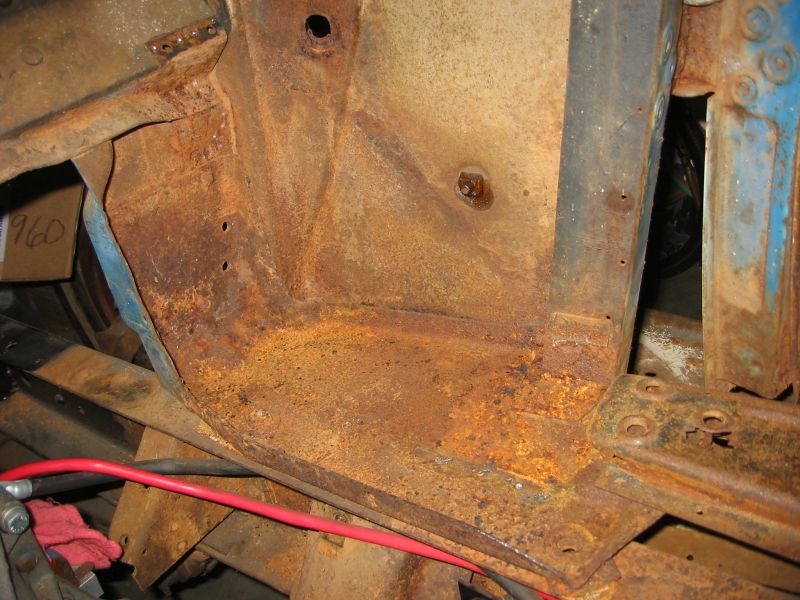
I drilled the spot welds and just chiseled through some of the
rotted metal to get this out. Now you can start to see the dish shaped
metal bracket that was underneath. This is
the main support for the whole front of the cab. It is heavily rusted,
but because it is thick metal, there is still quite a bit left. Good
thing, because it would be a challenge to replace.
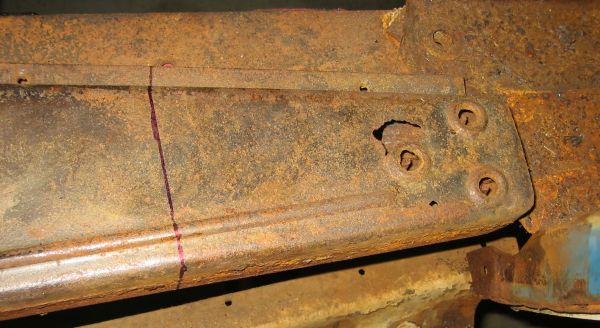
Next, I will cut off the bad floor extension. I drew
a line at a point where I am going to cut, getting rid of all the bad metal, but stopping
before we
get into more complex bends farther to the left . Everything to the right of the line will
be replaced. The metal to the left is in pretty good shape.
I made this cut as straight as I could. That will help me later
when I fit the new piece. This is 1/16 inch steel. My pneumatic cutoff
tool works great for this.
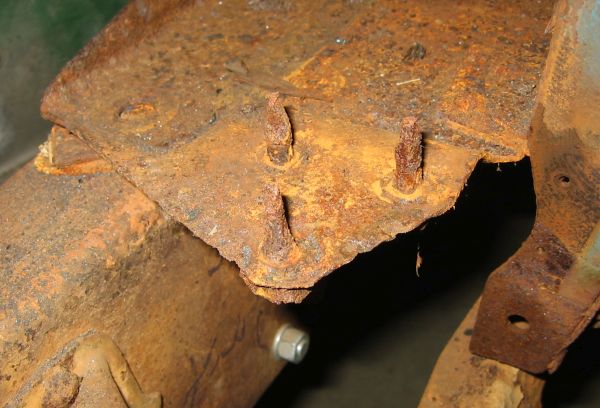
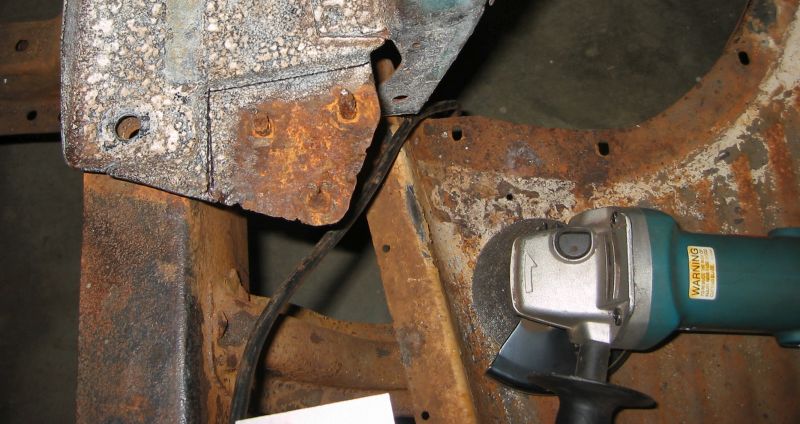
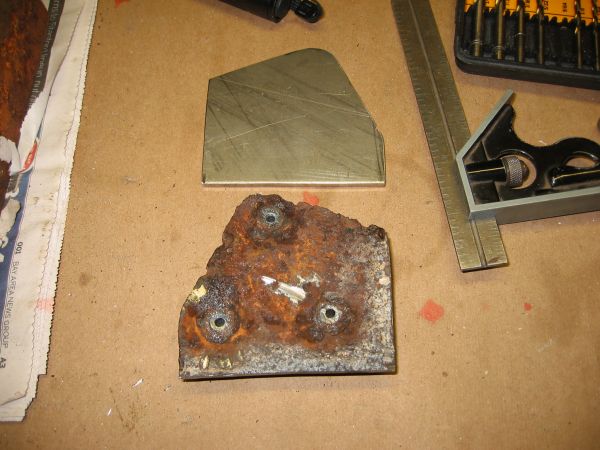
Now with that out of the way... these are the "bolts" that
went through the wooden support
block. These used to be 5/16 inch bolts, so that is some pretty heavy
rust damage. As bad as this bracket looks in this picture, there is
still a fair bit of metal left, and I cringe at the thought of
replacing this. So all I am going to do with this is replace the
corner that contained the three nuts.
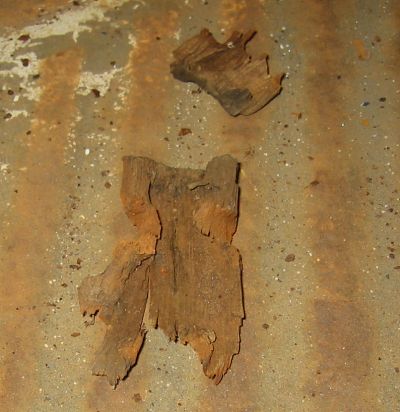
And what does the 75 year old wooden block look like?
Surprising that there is anything left at all really.
Ok, so lets replace this corner. The lines are drawn along
some bends in the metal, which dont show up well in this picture. I
have treated the rest of this bracket with SEM Rust Mort, which is why
it has a white color now. Rust Mort is actually supposed to produce a
black finish, but because this is so heavily rusted, it seems to be
acting a little weird.
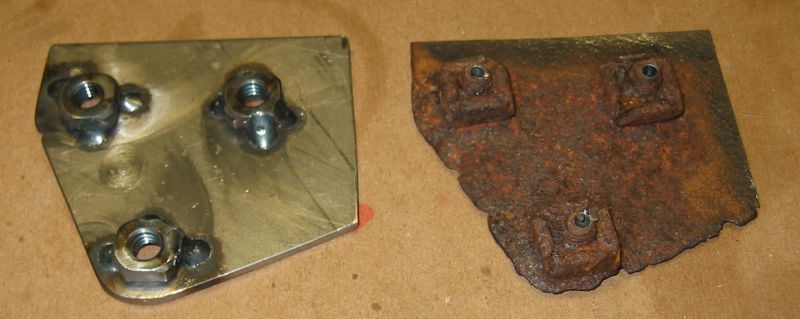
I start with a piece of 1/8 steel the same shape as the
original. (Or at least it would
be the same shape if I had flipped it over for this picture.) The rusty
metal actually measures a bit less than 1/8, but it was probably 1/8
when it was new.
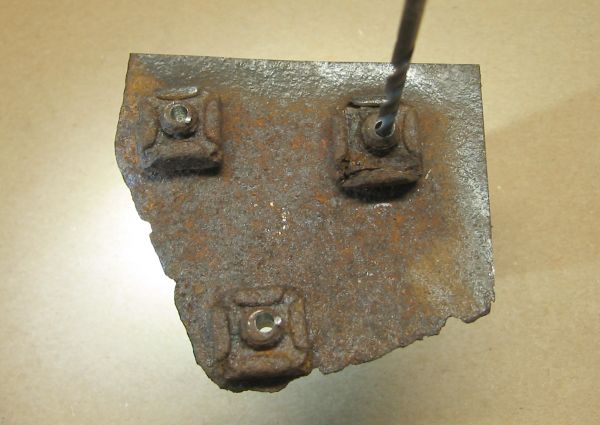
The easiest way to mark the hole locations was to drill out
the old bolts (which are rusted into the old nuts), and use the old
part to directly mark the hole locations on the new metal.
I love this
photo! I was trying to make the holes show up by backlighting the
piece, and it came out looking like it is floating in space. It is
actually sitting on a ratchet socket (see the shadow on the
right) and I am backlighting with a small flashlight from the left.
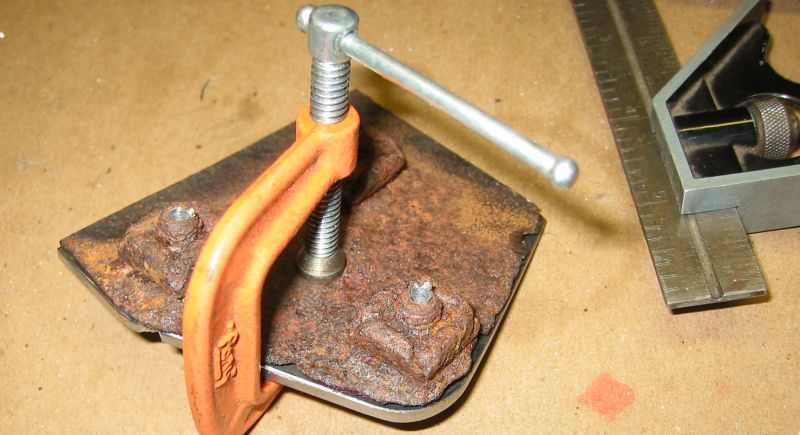
I
then clamp the old and new pieces together and use a drill to mark the
hole locations. The holes are then drilled out oversize and I will weld
nuts onto the back side.
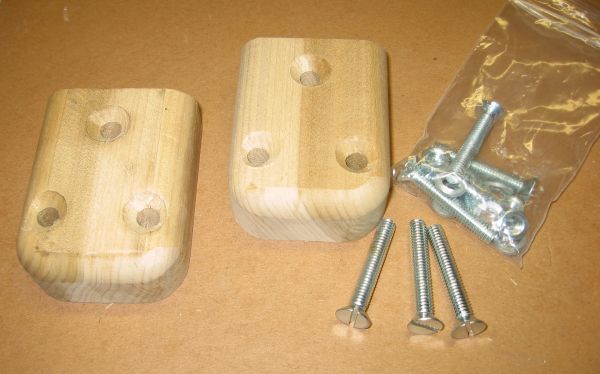
I didnt really know what the wooden blocks were supposed to look
like, but fortunately, they are easy to find on automobile restoration
web sites. This set from Jim Carter Truck Parts
came with blocks for right and left sides, and new bolts. In hind
sight, since I am replacing the metal on both sides of these blocks, I
should have used the blocks to reference the hole locations, not the
old metal.

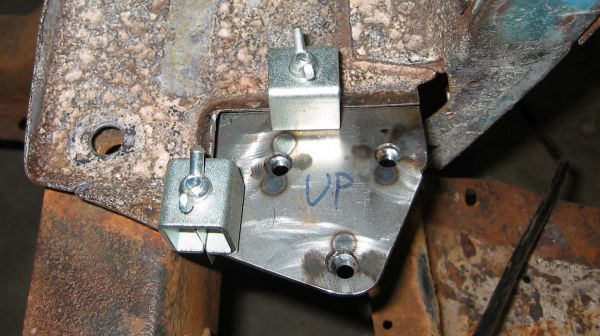
I did use the wood blocks to align the nuts. This is a good place to
point out that I did not necessarily do all the work in the same order
that I am documenting here. The replacement floor extension has already
been
fabricated, and was used in this stackup along with the new bolt and
nut, to align the nut for welding. We will get to the floor extention
in the next article.
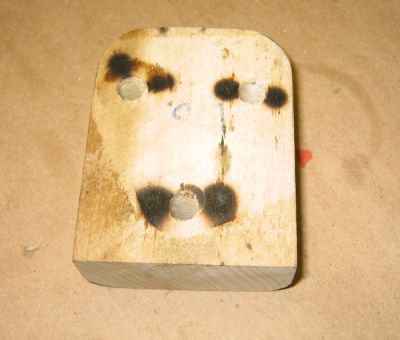
I did some spot welds with the MIG welder to lock the nuts into
position. I need to keep the welds as quick as possible to reduce the
heat, and prevent scorching of the wood block underneath. I did a few
more, hotter welds after removing he wood.
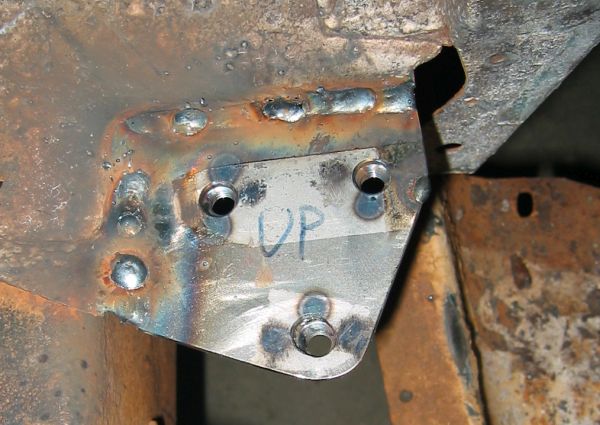
Then it is just a matter of welding our new piece back into the
truck. I did grind the rust off of old metal the best I could, both top
and bottom. The clamps I am using here are meant for sheet metal work.
I have never used them before and wanted to try them out. They are not
ideal, but they got the job done.
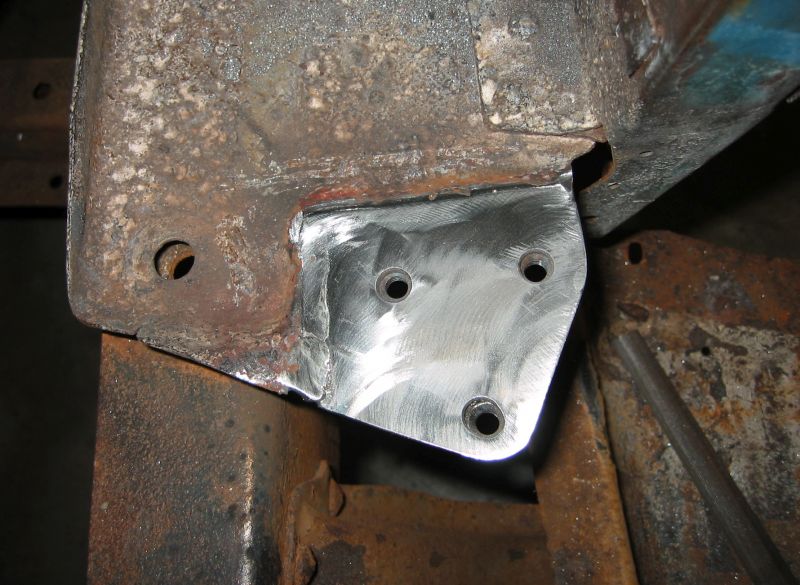
With some cleanup work it looks pretty nice. Along with some good metal treatments, maybe it will last another 75 years.