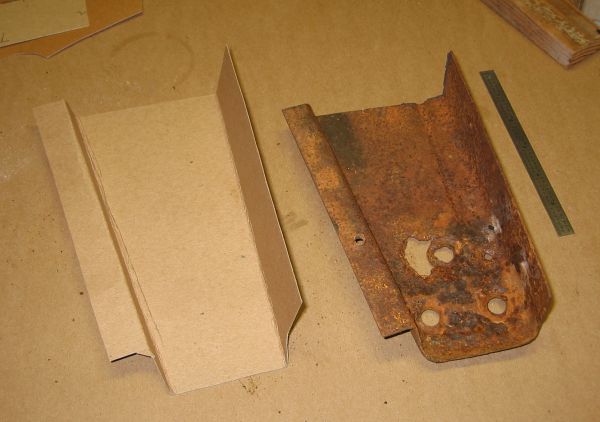
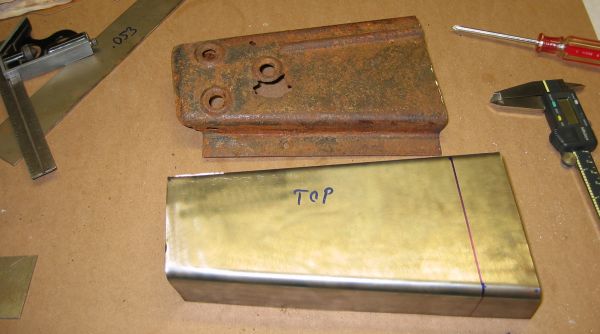
In our last episode, we had cut off this rotted floor extension arm, and now we need to replace it.
First problem: nobody makes these. I occasionally see an original 1940's piece on ebay, which are in a little better shape than this, but I have never seen anyone selling new replacement pieces. So.... lets make one.
As usual, I start with a cardboard model. Then I fatten out the cardboard and use it as a pattern to cut sheet metal.
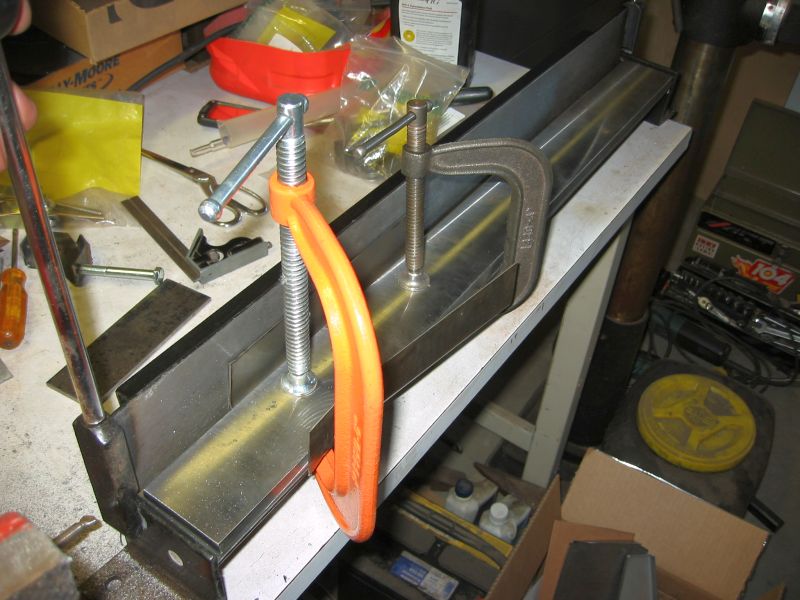
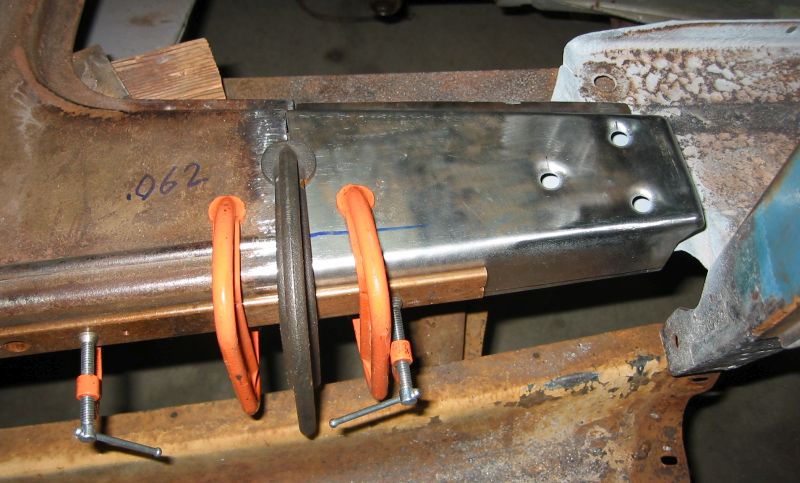
I picked up a low budget sheet metal
bender at Harbor Freight last summer. It has a lot of limitations, but
when I am able to use it, it actually does a fairly nice job. It is way better
than bending metal in a vise. You can kind of see my sheet metal in
there between the C-clamps.
I always have trouble getting bends to come out where I want them. In order for this piece to fit up to the rest of the floor board, the width has to match exactly. In this case, because the piece has a tapper to it, I was able to cheat. I cut the metal longer on each end than what I really need, then I bend it, and then I cut it off where ever the width happens to be right. The width has to be right somewhere along the tapper.
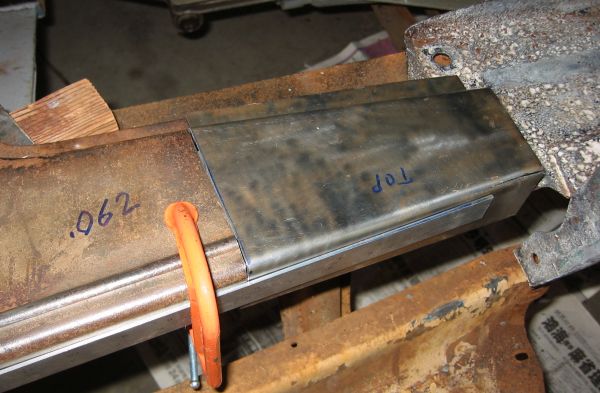
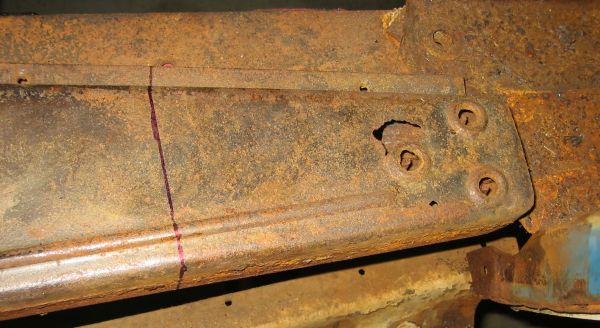
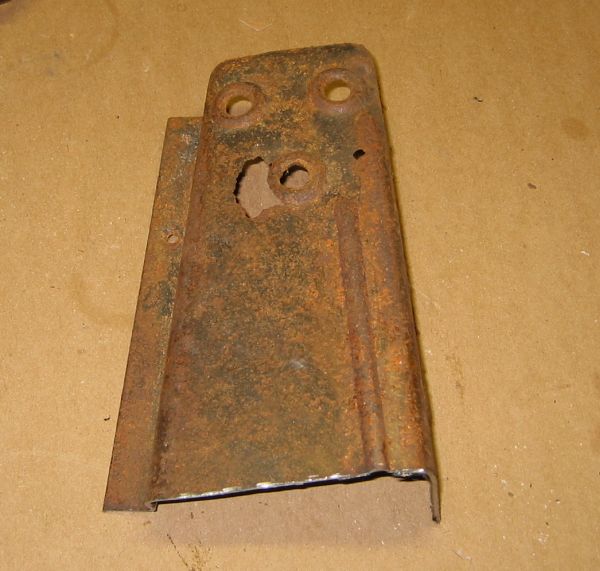
After I cut it, I do a trial fit. Some filing is always needed to get a good match up between the old and new parts. You may notice that the original part had a bead rolled into it, but this is one details that I just cant reproduce.
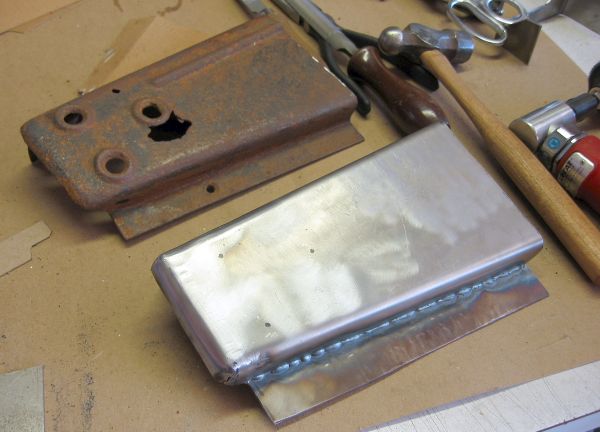
I finished the nose of the piece with some hand hammering. The lower bend (where you see the weld bead) is one of those places that I just cant reach with my bender. The best (and the most accurate) way that I have found to bend edges like this is to use a cutoff wheel on the back side of the piece to cut about 3/4 of the way thru the piece, and then just bend it by hand. Once the bend angle is good, go back and weld up the cut. This give a very sharp bend radius, which also happens to give you a fairly precise bend location.
It occurs to me that the ball peen hammer on my bench may seem like an odd thing to use for metal working. This is a fairly small hammer that I have polished on the end for metal forming. It is a little heavier and has a much smaller head than a normal body hammer. Especially when working with thicker metal like this, I find this hammer much more effective. (I dont use the ball end.)
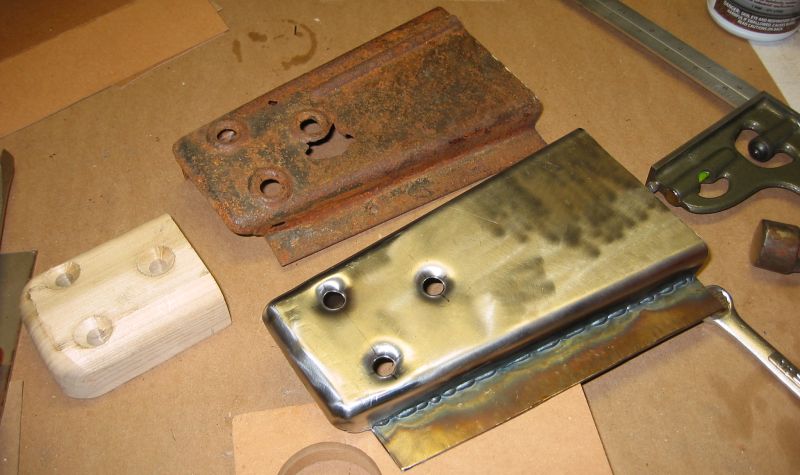
I used the old part as a pattern to mark and drill the three bolt holes. Then I used the wood block and a flathead screw as a punch and die to "countersink" the holes. The raised rings around the original bolt holes is another detail that seemed way too difficult to reproduce.
Now that it fits pretty well, I clamp it in place for welding. The welding starts out kind of slow. I do a spot weld or two where the surface of the two pieces is perfectly aligned. Then I move the clamps around to get another spot perfectly aligned.
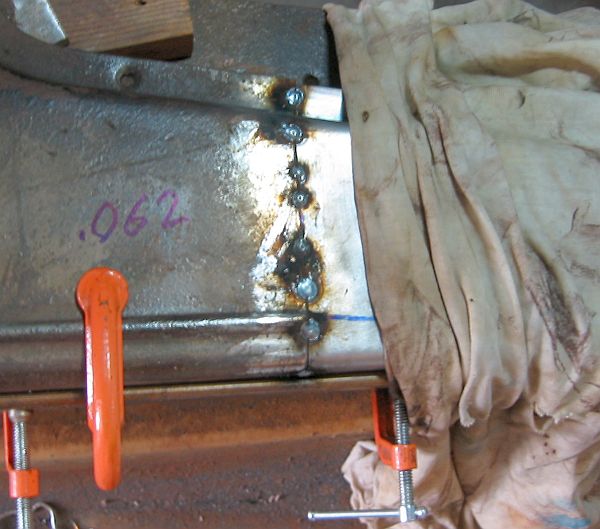
After enough spot welds, it is aligned everywhere and all clamps can be removed. The WET rag is here to protect the nice shiny new metal from weld spatter. I tried this with a dry rag once: I had to stop welding and put out a fire.
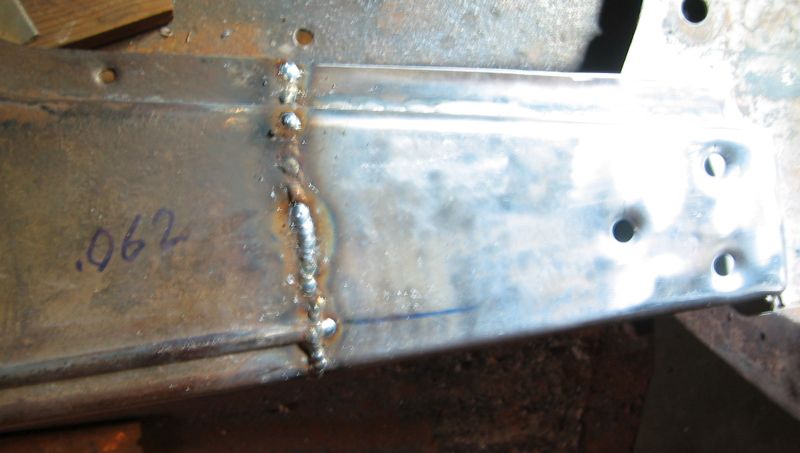
Then finish up the welding by filling in between the spots. I added a little filler metal at the end of the factory rolled bead, to try to give the bead a finished looking end.
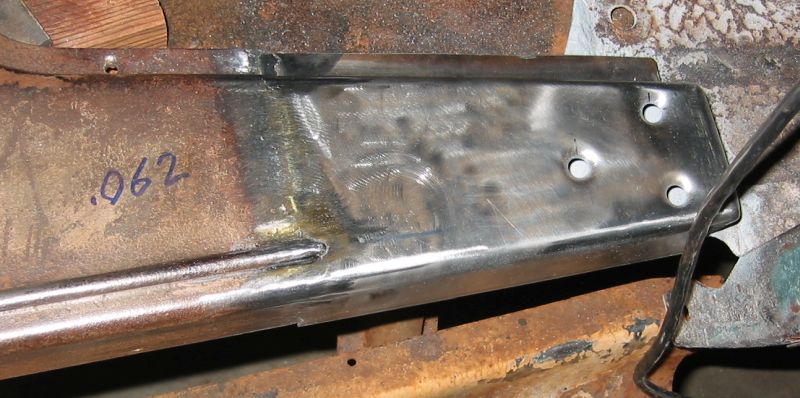
Then grind the weld bead down flat. One thing you can not see in the pictures: I sparyed primer on the under side of this piece, up to half an inch from the weld edge, before welding it on. The top side will be primed later, but the under side becomes much harder to reach.
A professional could probably do this in an afternoon. I have been picking away at this for months, and there is still more rust repair to go.
| << Previous | Back to Menu | Next >> |