or "How to Put a Stereo in the Dash of a 41 Chevy"
In 1941, a radio was a big wooden box full of vacuum tubes, and a stereo hadn't been invented yet. So they didn't put either in trucks and didn't leave me much room to add one.
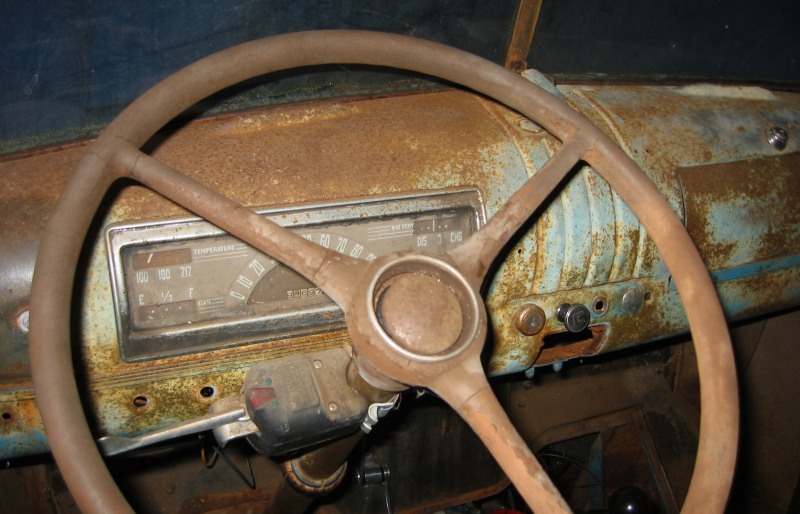
I had removed the dashboard a few months ago in anticipation of this job, and in doing so, uncovered gobs of more rust that I hadn't known about. These panels all look so good on the front painted side, and so horrible on the back. But thats another story. From the edge of the instrument panel to the edge of the glove box is only 8-1/2 inches, and the width of a standard "1 DIN" stereo today is 7-1/8. Trying to put that in the dash would look like a serious hack.
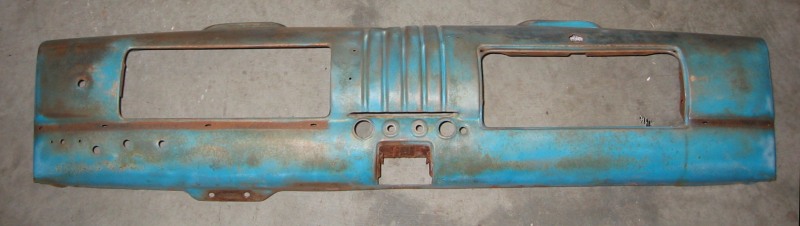
(Its funny how the color looks completely different between these two photos. This is the same exact dashboard, just cleaned up with a wire wheel.)
I did some searching, and found Retrosound. They specialize in modern car stereos for vintage vehicles. This can play music files on USB flash drive, supports bluetooth phone, and iPod support as well as AM/FM, but we were talking about fit. Their head unit is very small compared to standard stereos. This image shows my old JVC next to the Retrosound.
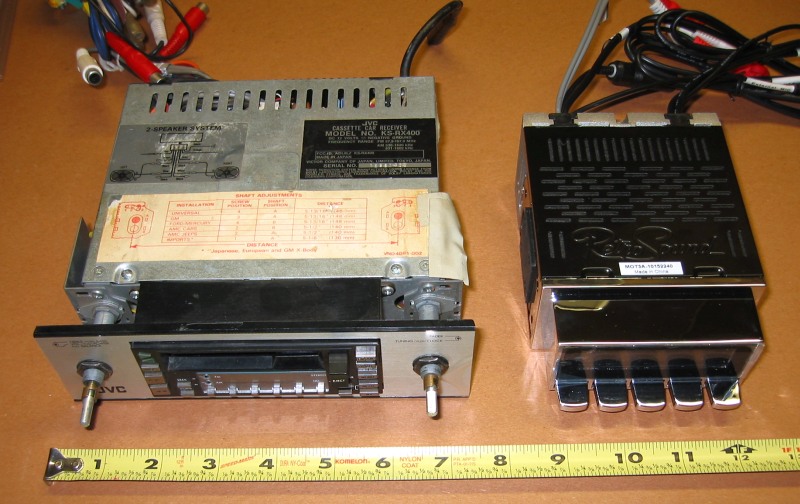
But their real magic is that the volume/tuning knobs are separate from the head unit, and may be mounted anywhere.
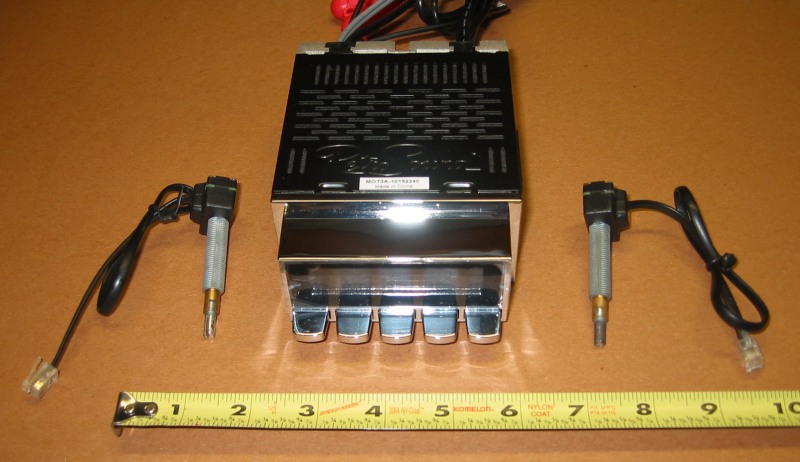
This is important for early vehicles before there were standard sizes. Radios in older cars had many different widths and knob spacing. Retrosound solves this with relocatable knobs and custom mounting plates for most popular vintage vehicles. They don't have one for my truck though, because there isn't any hole to mount it in. So, time to cut a nice big hole.

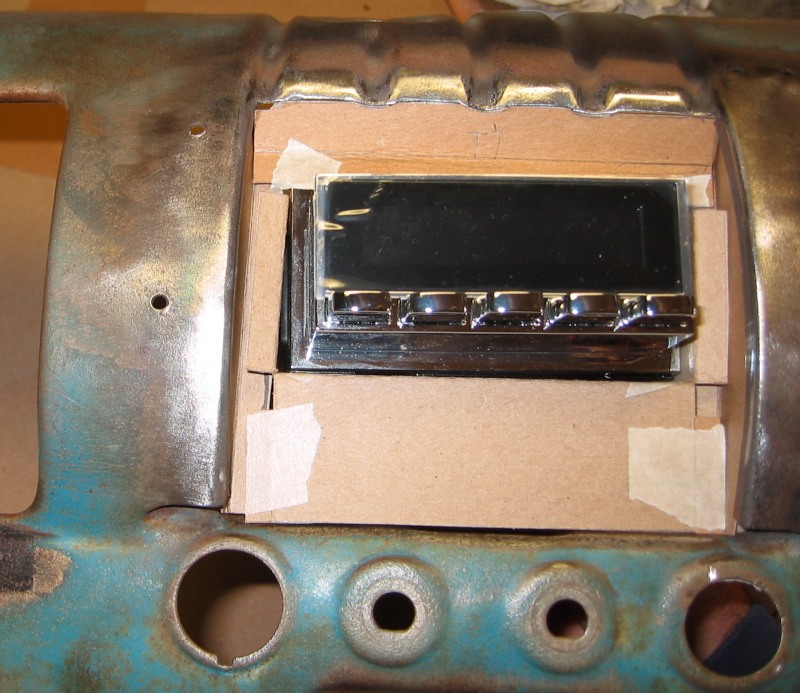
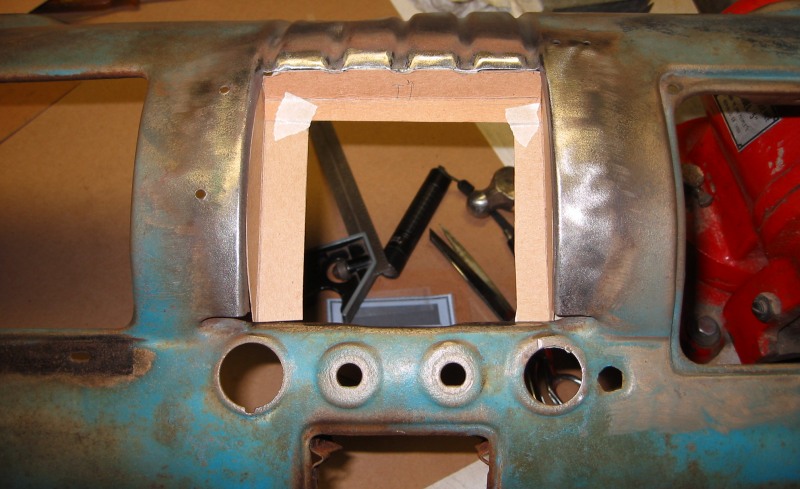
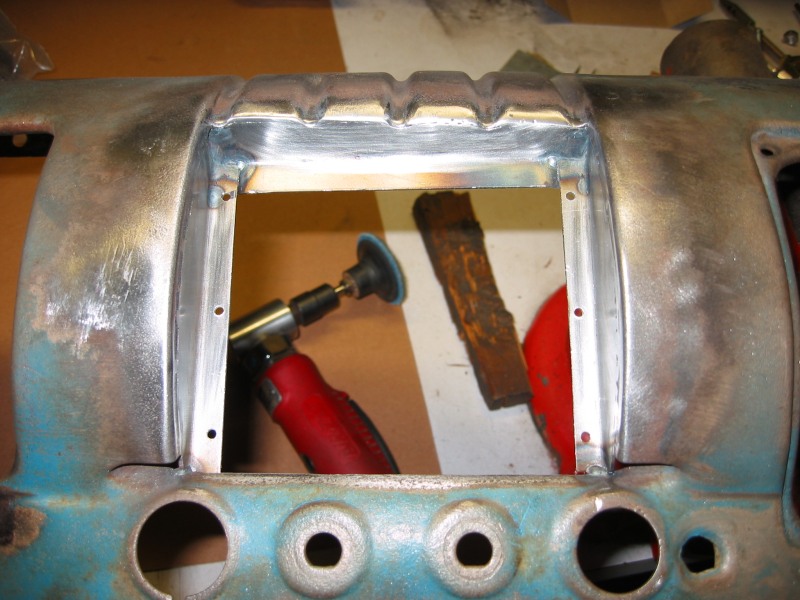
I tried to cut this and shape the edges of the hole to make it look like Chevy might have done it. And the Retrosound stereo is small enough to fit in this hole. The knobs will have to be positioned above or below the stereo, there is no room to the sides. This will be unconventional and might look a little strange, but it should work fine. Ignore the cardboard for now, I will get to that in a minute.
The smaller holes you see here are for the ignition key, the choke, throttle, and cigarette lighter. I could use some of these holes for the stereo knobs if I need to, but I would rather leave these stock.
For many decades, car manufactures built their radios to mount from behind the dash. To remove the radio, you would remove the knobs, remove the nuts from the knob shafts, and then push the radio back inside the dashboard and then try to work it down and out from under the dash. An absolutely terrible (though simple) design! My old JVC is an example. Over the years, as dashboards became more crowded, this concept was abandoned and they started making radios mount from the front. This makes them way easier to remove.
Though I dont expect this dash to get very crowded, I like to
do things the right way, not the easy way. (Which might be why I have
been working on this truck for five years now.) I am basically going to
frame my dash opening so that the radio can slide in from the front and
screw in. Now we get to the cardboard.
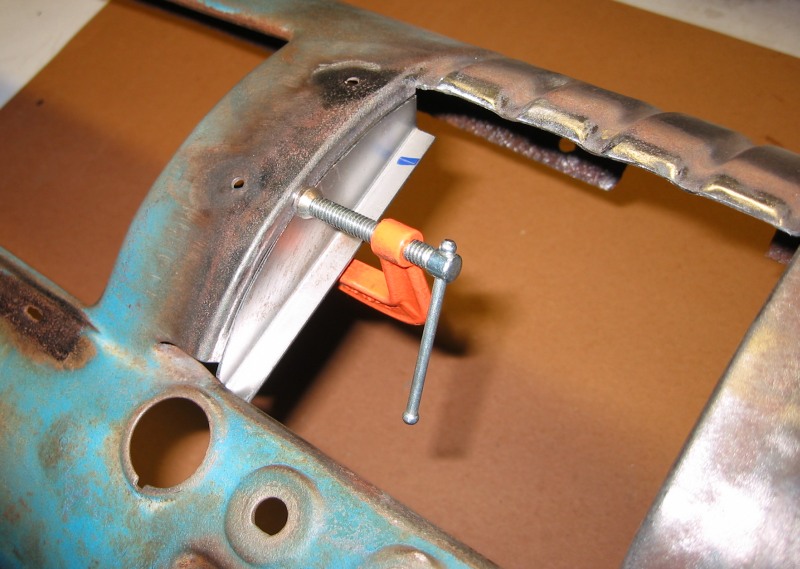

Then tack weld it in place.
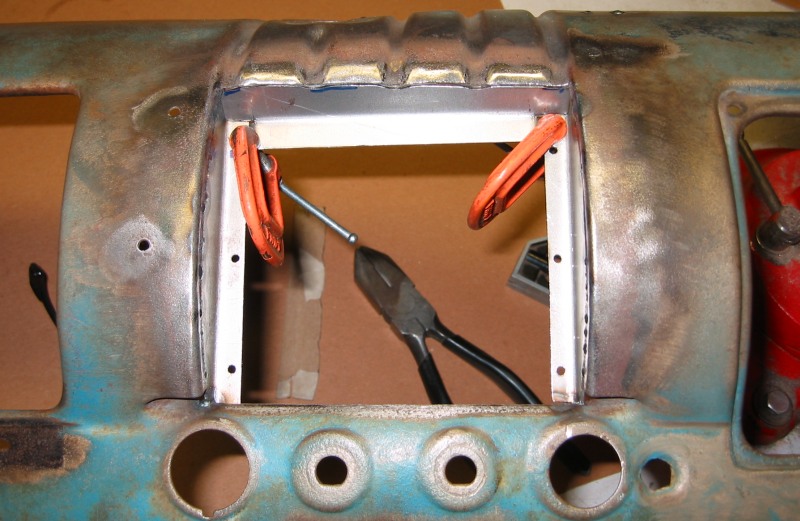
When I am done, I will have a mounting base for a frame plate. My radio will be mounted into the frame.
I pretend like this is easy, but I really spend a lot of time measuring and double checking and making sure that the mounting surfaces stay parallel. I spent two weekends in the shop just getting to this point.
On a somewhat unrelated side note, a lot of holes have accumulated in this dashboard over the years. These are all screw holes that have been drilled for I have no idea what, and I want to un-drill them.
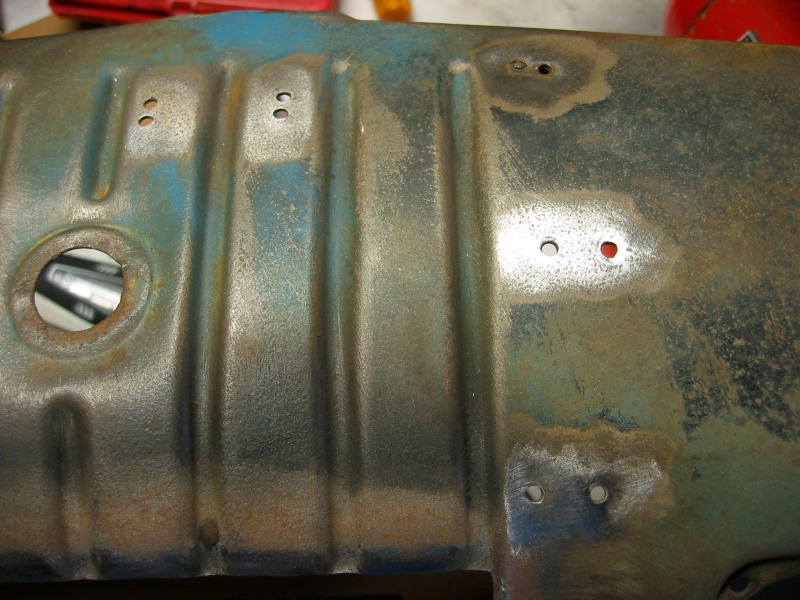
So while I am welding on my dash anyway, its a good time to fill these holes. I start by sanding the paint and rust from around the holes, I also also try to clean inside the hole itself to remove as much rust as I can, as the rust can interfere with the weld.
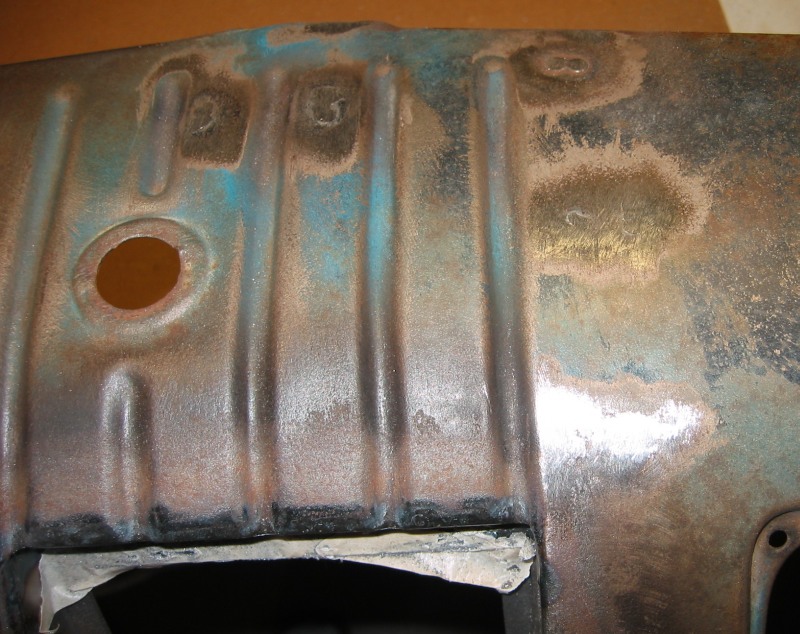
A MIG welder is great at filling small holes, since it automatically feeds filler metal, all I have to do is point and shoot. Since this is sheet metal, you do need to be a little careful with the heat. It doesnt take much to melt a big hole clear thru the metal. The trick to MIG welding sheet metal is to go in 1 second bursts, dont try to fill the hole in one shot. I use about three 1 second welds to fill each hole. This is 18 gage metal, which is fairly easy to work with. Thiner metal gets much more dicey.
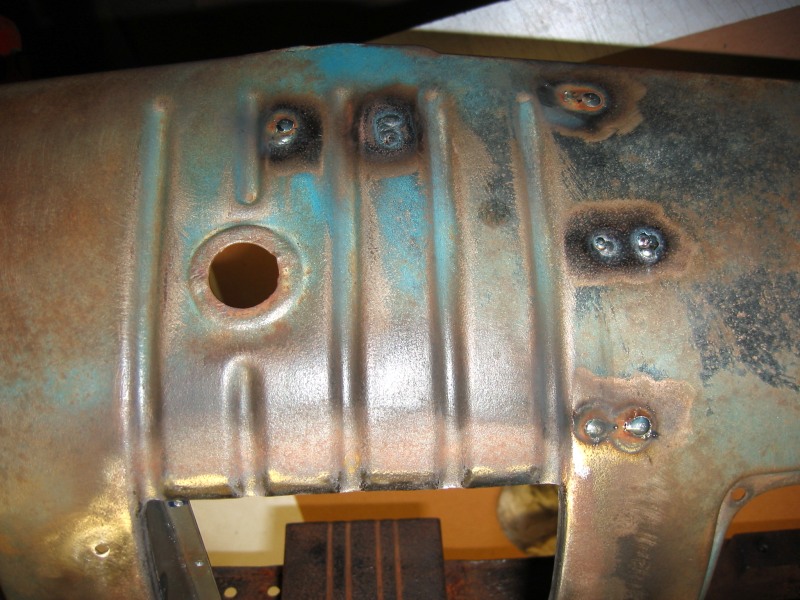
The convex curvature of this panel makes it relatively easy to file the welds down smooth. With some primer and paint, these will disappear completely.
| << Previous | Back to Menu | Next >> |